
Getting a radon test back above 4 pCi/L is unsettling, but lowering that number is a well-documented process most Michigan homes complete with one system installation and a follow-up test.
- Sub-slab depressurization systems lower radon levels below the EPA action level of 4 pCi/L in most Michigan homes, per EPA guidance.
- Retest 24 hours after installation, then again at 90 days, to confirm the reduction holds through 2026’s seasonal swings.
- Sump pumps, finished basements, and slab cracks each need a different sealing or venting approach — one system rarely covers all three.
- A radon fan humming louder than normal or a manometer stuck at zero means the system has failed, not that levels are fine.
Why This Matters
Radon is odorless, colorless, and completely undetectable without a test — that's what makes a result above 4 pCi/L worth acting on quickly, not waiting on. Michigan's glacial soil and clay-heavy foundations push radon gas upward through slab cracks, sump pits, and crawl space dirt floors at higher rates than much of the country, which is why so many homes here test above the EPA action level in the first place.
The good news: mitigation is not a guessing game. A finished basement radon mitigation system or a standard sub-slab setup can cut indoor radon by up to 99%, according to EPA data, dropping most homes from the 8-15 pCi/L range down to 1-2 pCi/L. The process below walks through what a proper fix looks like in 2026, foundation type by foundation type.
What You'll Need
- A confirmed test result above 4 pCi/L — short-term or long-term, ideally from an NRPP-certified test
- Knowledge of your foundation type: basement, crawl space, slab-on-grade, or a mix
- Access to the lowest level of the home, including any sump pit or crawl space
- A licensed radon mitigation contractor for the system installation itself — this is not a reliable DIY project once you're past sealing visible cracks
- A continuous radon monitor or a follow-up test kit to verify results after installation
- A few hours of access time for the contractor; most single-system installations wrap up in one visit
The Steps
1. Confirm the result with a follow-up test
One short-term test isn't the whole picture — radon fluctuates with weather, HVAC use, and season. Run a second test, ideally a different type than the first (swap a short-term charcoal kit for a longer alpha-track test), before scheduling mitigation. Expected outcome: a confirmed average that tells you whether you're dealing with 4.5 pCi/L or 15 pCi/L, which changes the urgency and system design. Common mistake: treating a single high reading during a storm or with windows shut as gospel — retest under normal living conditions.
2. Identify your foundation type and entry points
Radon enters differently depending on whether you have a basement, crawl space, or slab-on-grade foundation, and each type needs a different mitigation design. Walk the lowest level and note slab cracks, exposed dirt, sump pits, and any floor drains. Expected outcome: a map of every likely entry point before a contractor arrives. Common mistake: assuming one visible crack is the only entry point — radon moves through soil gas pressure differentials, not just obvious gaps.
3. Choose the right system for that foundation
Sub-slab depressurization works for basements and slab-on-grade homes with a solid concrete floor. Homes with sump pumps often route the mitigation pipe through a sealed sump lid instead of drilling a new hole. Expected outcome: a system spec that matches your actual foundation, not a generic install. Common mistake: installing a passive system when a home's radon level calls for active fan-driven depressurization — passive systems alone rarely pull levels below 4 pCi/L in Michigan's soil conditions.
4. Install the vent pipe and fan
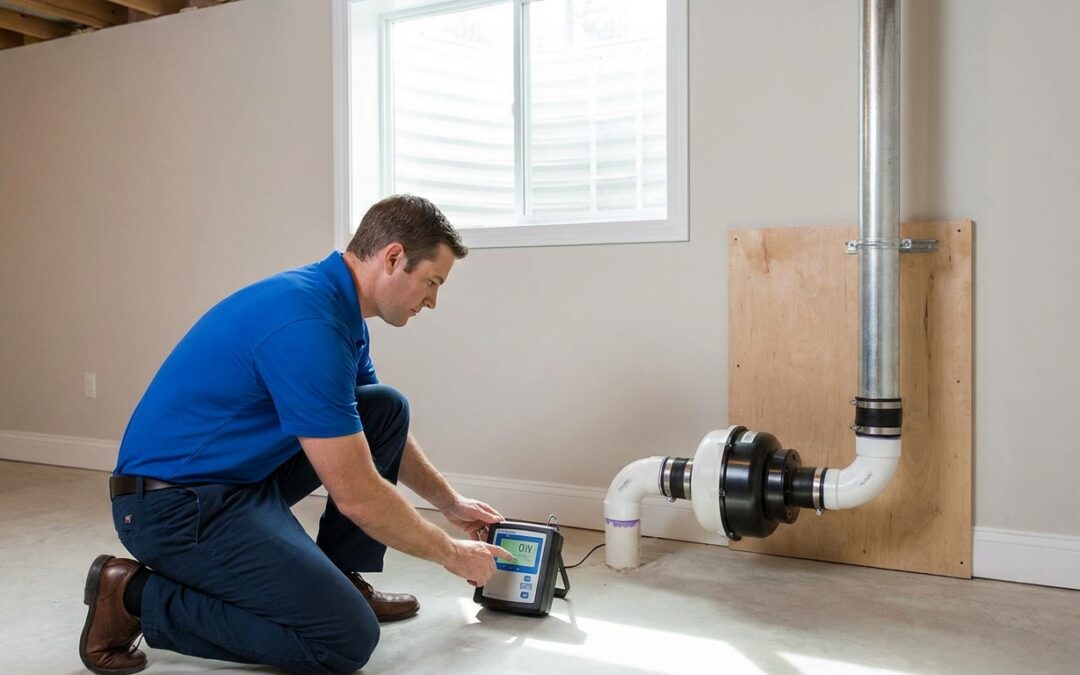
A certified contractor drills a suction point through the slab, routes PVC pipe to the exterior or attic, and mounts an in-line radon fan that runs continuously. This creates negative pressure under the slab, pulling radon gas out before it enters living space. Expected outcome: a visible pipe run and a U-tube manometer gauge showing active suction. Common mistake: venting the exhaust too close to a window, door, or roofline — code requires proper clearance so the discharged gas doesn't re-enter the home.
5. Address secondary entry points
Homes with sump pumps need the pit sealed with an airtight lid tied into the mitigation system, since an open sump pit is one of the largest single radon entry points in a Michigan basement. Finished basements add complexity because wall cavities and finished floors can hide additional gaps. Expected outcome: every known entry point either sealed or vented through the active system. Common mistake: sealing the sump lid but leaving the float switch cord as an unsealed gap — small openings still leak measurable radon.
6. Seal remaining foundation cracks
Use polyurethane caulk on visible slab cracks and the joint where the floor meets the foundation wall. Sealing alone won't get most homes below 4 pCi/L, but it improves the efficiency of the active system already doing the heavy lifting. Expected outcome: fewer uncontrolled air pathways competing with the mitigation system's suction. Common mistake: relying on sealing as a standalone fix — EPA guidance is clear that sealing without active depressurization rarely achieves reliable long-term reduction.
7. Verify the system is working
Check the manometer gauge daily for the first week, then weekly after that — it should show consistent negative pressure, not a reading stuck at zero. Confirm the fan is running by listening for steady, quiet airflow. Expected outcome: stable gauge readings and no unusual fan noise. Common mistake: ignoring a silent fan, assuming it's just quiet, when it's actually failed.
8. Retest to confirm the reduction
Run a short-term test 24 hours after the system is fully operational, then a longer confirmation test around the 90-day mark to account for seasonal pressure changes. Expected outcome: a result at or below 2 pCi/L in most cases, well under the 4 pCi/L action level. Common mistake: testing immediately after installation without letting the system stabilize for a full day first.
Get your radon level checked
NRPP-certified testing and mitigation across Metro Detroit and Lansing.
Troubleshooting
- Levels still above 4 pCi/L after installation — the system likely needs a second suction point, especially in homes with multiple foundation sections or a slab poured in phases.
- Fan humming louder than usual — this usually means bearing wear inside the fan motor; a failing fan can still spin while barely moving air.
- Manometer gauge reads zero — check for a tripped breaker or an unplugged fan before assuming the whole system failed.
- Levels rise in winter — the stack effect pulls more soil gas indoors when furnaces run constantly; a slightly undersized system that worked in summer can underperform in a Michigan January.
- New crack or gap appears after a few years — foundations shift; reseal visible cracks annually and recheck the sump lid seal.
- Test results vary wildly between rooms — radon concentration isn't uniform; always test the lowest lived-in level, not a random upstairs room.
Tools and Resources
- A continuous radon monitor gives real-time tracking instead of a single point-in-time number — see the best continuous radon monitors for Michigan homes for models built for year-round conditions.
- A U-tube manometer, included with most professional installs, confirms the fan is actively depressurizing the slab.
- Polyurethane caulk rated for concrete, for sealing visible cracks before or after installation.
- An NRPP-certified contractor for the fan and vent pipe work — this part of the job isn't a reasonable DIY undertaking given the code and pressure-testing requirements involved.
What to Do Next
If your test confirmed a level above 4 pCi/L, the next move is scheduling the install rather than retesting repeatedly hoping the number changes. Full details on what a professional install involves, from permitting to fan placement, are covered in this guide to radon mitigation system installation for Michigan homes.
FAQ
What is the EPA action level for radon?
The EPA action level is 4 pCi/L. Any confirmed indoor average at or above that level warrants mitigation, and the EPA notes that even levels between 2 and 4 pCi/L carry meaningful risk worth considering.
How long does it take to lower radon levels after mitigation?
Most systems reduce indoor radon within 24 hours of full operation. A short-term test 24 hours post-install typically shows the drop, with a 90-day retest confirming it holds through seasonal changes.
Can radon levels be reduced without a mitigation system?
Sealing cracks and improving ventilation can lower radon slightly, but rarely enough to get a Michigan home below 4 pCi/L on its own. Active sub-slab depressurization is the method EPA data shows reliably works.
Is a radon level of 4 pCi/L dangerous?
4 pCi/L is the threshold where the EPA recommends action, not a hard safety cliff. Risk rises with both concentration and years of exposure, which is why the EPA also flags 2-4 pCi/L as worth considering for mitigation.
How much does radon mitigation cost in Michigan?
Cost varies by foundation type, home size, and system complexity. Getting a specific quote from a certified contractor after a confirmed test is the only reliable way to know your number.
Does sealing cracks alone lower radon enough?
Rarely on its own. Sealing improves the efficiency of an active depressurization system but by itself usually isn’t enough to bring a Michigan home below the 4 pCi/L action level.
How often should I retest after mitigation?
Retest 24 hours after the system is running, then again around 90 days out, and annually after that. Radon levels shift with seasons, so a single test right after install doesn’t tell the whole story.
Can I install a radon mitigation system myself?
Sealing visible cracks is reasonable DIY work, but the fan and vent pipe installation involves code compliance and pressure testing best left to an NRPP-certified contractor. A poorly placed vent can actually pull radon back indoors.
One Last Thing
The EPA's own data shows mitigation systems reduce indoor radon by up to 99% — homes that come in at 12 or 15 pCi/L before mitigation routinely land at 1-2 pCi/L after, not just under the 4 pCi/L line but well below it. If your post-mitigation retest still shows a number close to 4 pCi/L, that's a sign the system needs a second suction point or a fan upgrade, not a sign you should settle for barely passing.
Related Guides
- How to verify your radon mitigation system is still working
- How to tell if your radon mitigation fan needs replacing
- Radon mitigation systems for crawl space homes
- Radon mitigation for slab-on-grade homes
- How to maintain your radon mitigation system