
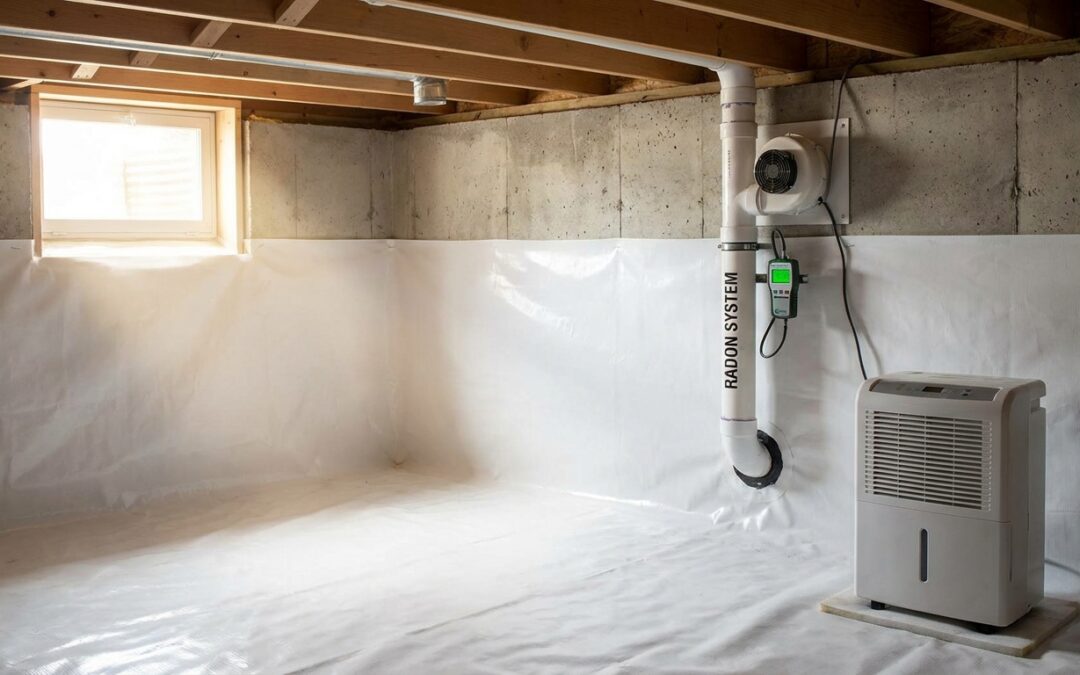
Crawl space encapsulation and radon mitigation solve two different problems, but in a Michigan crawl space home, one without the other leaves gaps you can't see. This guide walks through the order of operations, the shared equipment, and the mistakes that cost homeowners a second contractor visit.
- Encapsulate first, then install or adjust the radon mitigation system — reversing the order forces rework.
- A sealed crawl space with a sub-membrane suction point can pull radon below the EPA action level of 4 pCi/L.
- Michigan Radon Control coordinates both scopes so the vapor barrier and the radon pipe penetration happen in one visit.
- Skipping encapsulation on a high water table crawl space often means the radon fan runs harder and louder for years.
Why this matters
A crawl space is dirt or gravel sitting directly above soil gas. Radon moves through that soil and collects under whatever is on top of it — plastic sheeting, a slab, or nothing at all. In 2026, most Metro Detroit and Lansing-area crawl space homes still test above 4 pCi/L before any work is done, according to the readings Michigan Radon Control pulls from initial inspections across the region.
Encapsulation alone does not fix radon. Sealing a crawl space with a heavy vapor barrier actually traps gas more tightly against the floor joists above it if there's no suction point pulling that gas out and venting it above the roofline. That's the piece homeowners miss.
"Encapsulating a crawl space without addressing radon just traps the gas under new plastic." The fix is a sub-membrane depressurization system installed as part of the same job, not bolted on afterward.
What you'll need
- A working knowledge of your crawl space's current radon reading (or a completed test)
- 6-mil or thicker reinforced vapor barrier sized to the full crawl space footprint
- A radon-rated fan sized to the crawl space square footage, not a generic bathroom exhaust fan
- PVC piping routed from below the membrane through the roofline
- A U-tube manometer to confirm suction once the system runs
- Access to any existing sump pump or French drain, since both interact with the membrane seal
If your crawl space already has a mitigation system without encapsulation, review radon mitigation systems for crawl space homes before adding the barrier — the suction point placement changes depending on what's already down there.
The steps
1. Test the crawl space before touching anything
You need a baseline reading before any construction work starts, or you won't know if the combined system actually worked. A 48-hour short-term test in the crawl space itself, not just the living space above it, gives the real number.
Skipping this step is the most common mistake homeowners make in 2026 — they encapsulate for moisture control, assume radon dropped too, and never confirm it.
2. Clear and grade the crawl space floor
Remove debris, old insulation, and any loose gravel that won't hold a membrane seal. Low spots need minor grading so the vapor barrier lies flat instead of pooling water underneath it.
A membrane installed over uneven gravel tears within a year. Expect this step to add a half-day to the job on crawl spaces over 800 square feet.
3. Install the sub-membrane suction point first
This is where sequencing matters most. The suction pit — a small excavated area under the future membrane — goes in before the vapor barrier, not after. Installing the barrier first means cutting it open again to add the pit, which weakens the seal permanently.
Expected outcome: a clean pit roughly 12 inches across, connected to PVC pipe that will run through the membrane later.
4. Lay the vapor barrier and seal all seams
Overlap seams by at least 12 inches and tape every seam with a manufacturer-rated seam tape, not general construction tape. Seal the barrier to foundation walls, support piers, and any penetrations — plumbing, ductwork, electrical.
A barrier with unsealed seams lets outside air short-circuit the suction, so the fan works harder to pull the same vacuum. This is the step that most affects long-term fan noise and energy use.
5. Connect the radon pipe through the sealed membrane
The PVC pipe from the suction pit passes through a fitted, sealed collar in the membrane, then routes up through the house — typically through a closet or garage chase — and exits above the roofline per code. This keeps exhausted radon away from windows and air intakes.
Homes with attic routing options should compare this against radon mitigation systems installed in the attic before finalizing the pipe path.
6. Mount and wire the fan
The fan mounts outside the conditioned space — attic, garage, or exterior wall — never inside the crawl space itself, since fan failure in an enclosed space traps moisture and heat. Electrical work needs a dedicated GFCI-protected circuit.
7. Test suction and verify the reading dropped
Use the manometer at the suction pit to confirm negative pressure is pulling consistently. Then retest the crawl space air with another 48-hour test. A reading that stays above 4 pCi/L after installation means the pit, seams, or fan sizing needs adjustment — not a bigger fan by default.
Verdict: a properly sequenced encapsulation-plus-mitigation job should land the crawl space reading well under 4 pCi/L within days of activation.
Troubleshooting
- Reading still above 4 pCi/L after installation — check for unsealed seams or a suction pit that's too small for the square footage; re-seal before resizing the fan.
- Fan runs loud or vibrates — usually a mounting issue, not a fan defect; see how to fix a noisy radon mitigation fan.
- Membrane bubbles or lifts near piers — indicates trapped moisture underneath; the barrier needs a vent path or the grading step was skipped.
- Sump pump interferes with suction — an unsealed sump lid breaks the vacuum; sump lids need a gasketed seal that ties into the membrane.
- Condensation forms on the membrane — a sign the crawl space needs supplemental dehumidification alongside the radon system, common in homes with a high water table.
- Homeowner smells musty air upstairs after encapsulation — check for a torn seam near ductwork; this isn't a radon issue but it means the seal failed somewhere.
Get your crawl space assessed
Request an inspection before scheduling encapsulation work.
Tools and resources
- How to choose the right radon mitigation system type for comparing sub-slab versus sub-membrane approaches
- Radon mitigation for homes with a high water table if your crawl space floods seasonally
- How to verify your radon mitigation system is still working for annual checks after installation
- A U-tube manometer, sold at most HVAC supply houses, for ongoing suction checks
- Michigan Radon Control's NRPP-certified technicians for combined encapsulation and mitigation quotes
What to do next
Once the combined system is running, the next decision is confirming the reading holds through Michigan's heating season, when homes are sealed tighter and radon levels tend to run higher. Read how to schedule radon testing after mitigation installation to set that follow-up test correctly, and check current contractor options at best radon mitigation contractors in Metro Detroit if you're still comparing installers for the combined job.
FAQ
Does crawl space encapsulation lower radon on its own?
No. Encapsulation alone can trap radon more tightly under the vapor barrier without a suction point venting it outside. A combined system with sub-membrane depressurization is what actually lowers the reading.
What order should encapsulation and radon mitigation happen in?
Install the sub-membrane suction pit before laying the vapor barrier. Cutting the barrier open afterward to add a pit weakens the seal and often causes leaks within a year.
How much does combined crawl space encapsulation and radon mitigation cost in 2026?
Costs vary by crawl space size, moisture conditions, and pipe routing distance. Review the line items in how to budget for a radon mitigation system installation before requesting quotes.
Is a radon mitigation fan safe to mount inside an encapsulated crawl space?
No. The fan mounts outside the conditioned space, typically in an attic, garage, or exterior wall. Mounting it inside the sealed crawl space traps heat and moisture around the motor.
Can I test radon levels through the encapsulation membrane?
Testing happens in the crawl space air, not through the membrane itself. A 48-hour short-term test after the system activates confirms whether the reading dropped below 4 pCi/L.
Does encapsulation help with a high water table crawl space and radon at the same time?
Yes, when the membrane, sump seal, and suction pit are installed together. A high water table crawl space needs a gasketed sump lid tied into the vapor barrier or the seal fails.
How often does a combined system need maintenance?
Annual checks confirm fan function and manometer readings stay consistent. See how to verify your radon mitigation system is still working for the specific checks to run each year.
One last thing
The detail most homeowners skip in 2026: sealing the sump pump lid. A crawl space can have a flawless membrane and a properly sized fan, and still leak radon through an unsealed sump lid sitting right in the middle of the encapsulated floor. Check that lid before calling the job done.
Related guides
- Radon mitigation systems for crawl space homes
- Radon mitigation for homes with a high water table
- How to verify your radon mitigation system is still working
- How to choose the right radon mitigation system type
- Best radon mitigation contractors in Metro Detroit