
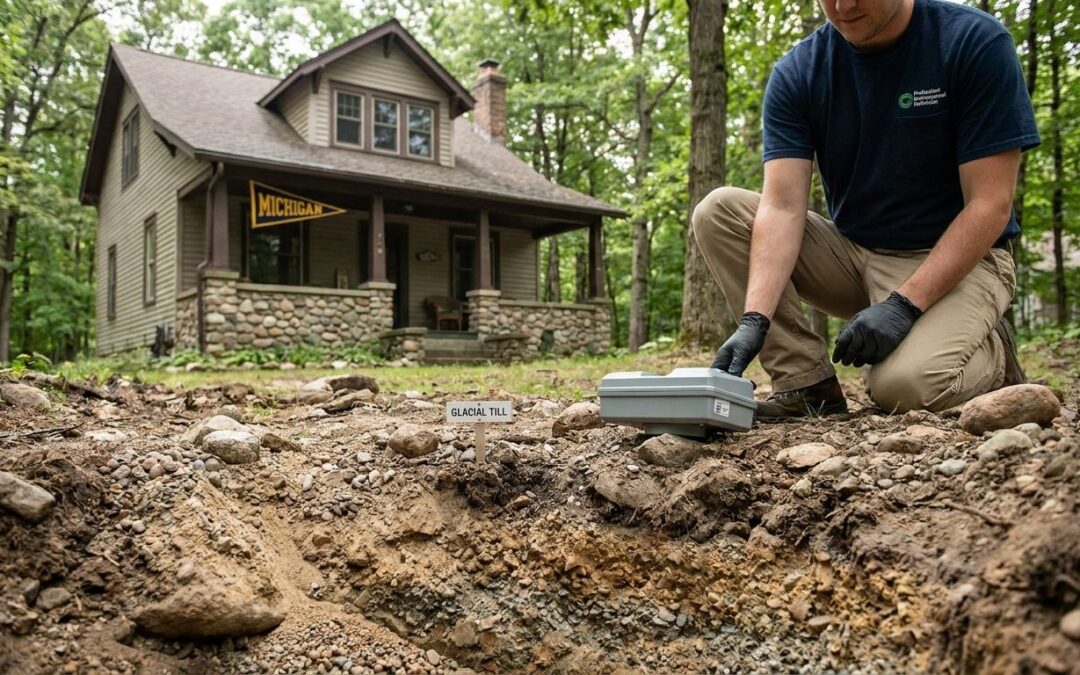
Radon testing for Michigan homes on glacial till soil follows the same EPA-based testing protocol as any property in the state, but the uneven mix of clay, sand, gravel, and boulders in till changes how radon moves underground and where a test result can go wrong. Till doesn't behave like solid bedrock or uniform sand — it's a patchwork left behind by receding ice sheets, and that patchwork creates radon pathways that can differ from one side of a house to the other.
- Radon testing for glacial till soil in Michigan requires closed-house conditions and kit placement away from sump pits and foundation cracks.
- Till’s clay-sand-gravel mix creates uneven radon pathways, so a single mitigation suction point often isn’t enough.
- Test short-term first, then move to a long-term or continuous monitor if the reading sits near 4 pCi/L.
- Till homes with a high water table frequently need drain tile suction instead of standard sub-slab depressurization.
- Winter testing with the house closed 12 hours beforehand gives the most reliable reading on till soil.
Why radon testing matters for homes on glacial till soil
Most of Lower Michigan sits on glacial till deposited as ice sheets ground over uranium-bearing granite and shale bedrock further north, then dropped that material in an uneven blanket as the ice retreated. Radon forms as that uranium decays underground, and it travels through soil gas toward the surface. In uniform sand, that gas moves predictably. In till, clay lenses sit next to gravel lenses in the same yard, so soil gas takes the path of least resistance — which is rarely a straight line.
That's why two houses on the same street, built on the same till formation, can post very different radon readings even with identical floor plans. It's also why a single indoor radon test on a till lot tells you less than the same test would on a sandy lot. For general testing guidance across the state, Michigan Radon Control's page on radon testing services for Michigan homeowners covers the baseline protocol this article builds on.
How to test a glacial till home for radon
1. Confirm your home sits on glacial till before you test
Check this before you buy a kit — it changes how you interpret the result.
- Look up your parcel on the USDA NRCS Web Soil Survey (free, no account needed)
- Call your county drain commissioner's office and ask about local till depth
- Ask your builder or a past owner about well log records for the lot
- Note whether neighbors have reported a high water table or a wet basement
- Check if your foundation type is slab-on-grade, basement, or crawl space — till behaves differently under each
2. Pick the right radon test kit for till conditions
A short-term charcoal or electret kit is the right starting point for almost every Michigan home, till or not.
- Buy an EPA-listed short-term kit and follow the closed-house protocol exactly
- Place the kit in the lowest lived-in level, away from sump pits, drains, and slab cracks
- Avoid corners with visible fill dirt or patched concrete — till fill areas skew readings
- Keep the kit at least 20 inches off the floor and away from exterior walls
- If the first result comes back near 4 pCi/L, follow up with a long-term kit or a continuous monitor before deciding on mitigation
Step-by-step placement and timing details are covered in how to test your home for radon.
3. Time the test to match Michigan's seasons
Till holds moisture differently than sand, and that moisture changes how much gas gets pushed through cracks.
- Test during winter with the furnace running and windows closed — this is when till homes post their most stable readings
- Avoid testing within 48 hours of heavy rain or spring thaw, when till near the surface saturates and pushes more gas upward
- Skip testing during active excavation, grading, or well drilling nearby
- Don't test right after a new sump pump install — freshly disturbed till around the pit throws off short-term readings
4. Prepare the space before the kit goes in
Basement prep matters more on till than on bedrock because till homes are more likely to have settled slabs and hairline cracks.
- Close all windows and exterior doors at least 12 hours before starting the test
- Seal obvious slab cracks and gaps around pipe penetrations, but don't caulk right before testing — let sealant cure first
- Turn off window fans, whole-house fans, and clothes dryers during the test period
- Keep the basement door closed if it's not a regularly used living space
Full prep steps are laid out in how to prepare your basement for a radon test.
5. Escalate to professional testing and mitigation design matched to till
Once a confirmed result sits at or above the EPA action level of 4 pCi/L, an NRPP-certified evaluation is the next move — not a second DIY kit.
- Ask the contractor to map suction point coverage against your till's density variation, not just slab square footage
- Request a smoke test or manometer reading to confirm each suction point is actually pulling from beneath the slab
- If your lot has a high water table (common where till sits over a clay layer), ask specifically about drain tile suction versus standard sub-slab depressurization
- Get the mitigation design in writing before installation, including the number of suction points
- Confirm the installer carries current NRPP certification for your state
Michigan Radon Control designs sub-slab and drain-tile systems around this kind of till variability rather than defaulting to a single-point setup, which is the most common reason a till-home mitigation system underperforms.
6. Retest after mitigation and set a maintenance schedule
A mitigation system on till soil needs the same 24-to-48-hour post-installation retest as any other system, plus more frequent monitoring afterward.
- Retest 24-48 hours after fan installation to confirm the reduction
- Check the manometer or pressure gauge monthly for the first year
- Schedule a full retest every two years, or sooner if you notice new foundation cracks
- Retest immediately after any excavation, regrading, or well work near the foundation
Get your till-soil home tested
NRPP-certified radon testing and mitigation across Metro Detroit and Lansing.
Mitigation system options for glacial till homes
| Option | Best for | Key limitation |
|---|---|---|
| Sub-slab depressurization (multi-point) | Slab-on-grade homes on till with mixed clay/gravel pockets | Needs two or more suction points to reach isolated permeability zones |
| Sub-membrane depressurization | Crawl space homes over till, paired with a sealed vapor barrier | Every membrane seam has to be sealed or gas bypasses it |
| Drain tile suction | Till lots with a high water table or an intact perimeter drain system | Only works if the drain tile loop is continuous and connected |
| Passive stack (new construction) | New builds on till, installed before the slab pour | Passive-only setups may need fan conversion later if levels stay above 4 pCi/L |
Common mistakes homeowners make testing till-soil homes
- Testing once, in summer, and calling it settled — till's moisture content shifts radon output season to season, and a single warm-weather reading misses winter peaks.
- Assuming one suction point covers the whole slab — till's clay lenses isolate zones underground; a system sized for uniform sand often leaves a corner of the house unmitigated.
- Skipping membrane seam sealing in crawl spaces — till's variable permeability finds any gap in a vapor barrier faster than sand does.
- Ignoring lot-to-lot till thickness — a neighbor's clean test result on the same street doesn't transfer to your parcel; till depth varies within a single subdivision.
- Placing the test kit near a sump pit cut through till fill — disturbed till around a pit short-circuits the reading and produces a falsely high or low number.
FAQ
Does glacial till soil increase radon risk in Michigan homes?
Glacial till doesn’t automatically raise radon risk, but its mixed clay-sand-gravel structure creates uneven gas pathways that can produce inconsistent readings across a single lot. Testing accounts for that variability rather than assuming a uniform result.
How long should a radon test run on till soil?
A short-term test on till soil should run a minimum of 48 hours under closed-house conditions, the same EPA standard used statewide. If the result lands near 4 pCi/L, a long-term or continuous monitor gives a more reliable picture.
Is one radon mitigation suction point enough for a till home?
Often no. Till’s clay lenses can isolate zones under the slab, so a single suction point may depressurize one section while leaving another untouched. An NRPP-certified evaluation should map coverage before installation.
What’s the best time of year to test radon in a Michigan till home?
Winter, with the house closed and the furnace running, gives the most stable reading on till soil in 2026. Avoid testing within 48 hours of heavy rain or spring thaw, when saturated till pushes more gas upward.
How much does radon mitigation cost for a till-soil home?
Cost depends on the number of suction points and whether drain tile suction is needed instead of standard sub-slab depressurization; get a written quote after an NRPP-certified evaluation of your specific lot.
Can a high water table on till soil affect radon mitigation?
Yes. Till lots with a high water table often need drain tile suction rather than standard sub-slab depressurization, since standing water near the foundation limits where a suction point can be placed.
Do all Michigan counties on glacial till have elevated radon?
Not uniformly. Till thickness and composition vary by county and even by subdivision, which is why a neighbor’s clean test result doesn’t guarantee the same reading on your parcel.
Should I retest after a radon mitigation system is installed on till soil?
Retest 24 to 48 hours after fan installation, then again every two years, and immediately after any excavation or regrading near the foundation.
One last thing
The detail most homeowners miss in 2026 isn't the test — it's the suction point count on the mitigation quote. If a contractor proposes a single suction point for a till-soil home without mapping permeability zones first, ask why; that's the single most common cause of a mitigation system that passes its initial retest but drifts back above 4 pCi/L within a year or two.
Related guides